Most no-code automation tutorials cover the easy case: trigger, action, done. Approval workflows are where that simple model breaks down, because they need to pause and wait for a human decision, branch based on that decision, and often escalate if nobody responds in time. Here’s how to actually build one that holds up in production, using tools you likely already have in a no-code stack: Airtable, Make (or Zapier), and Slack or email as the approval interface.
Why Simple Zaps Fail for Approvals
A single linear automation (submission comes in → notify approver → done) has no way to wait for a response. The moment you need “if approved, do X; if rejected, do Y; if nobody responds in 48 hours, escalate to Z,” you need state — a record that tracks where the request currently sits — and a way for the approver’s action to trigger the next step. That means the workflow needs a database, not just a chain of triggers.
The Core Pattern: Status Field as State Machine
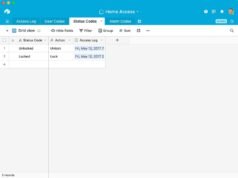
Use an Airtable table (or equivalent) with a single-select Status field as the source of truth: Submitted → Pending Approval → Approved / Rejected → Escalated. Every automation reads and writes that field rather than trying to track state inside the automation tool itself. This matters because it makes the whole workflow inspectable — anyone can open the table and see exactly where every request stands, and you can rebuild or fix a broken automation without losing state.
Step-by-Step Build
- Intake. A Tally or Fillout form (or a direct Airtable form) creates a record with Status = “Submitted.”
- Route to approver. A Make/Zapier automation triggers on new records, looks up the correct approver (based on department, amount, or request type — a lookup field in Airtable, not hardcoded logic), sets Status to “Pending Approval,” and sends a Slack message or email with two actionable buttons or links: Approve / Reject.
- Capture the decision. The cleanest way to do this without custom code is a pair of pre-filled links pointing to a small Airtable form (or a Fillout form) that updates the record’s Status field directly — one link sets it to “Approved,” the other to “Rejected,” each carrying the record ID as a hidden field. Slack’s native interactive buttons work too if you’re comfortable with a Make Slack-response webhook.
- Branch on the outcome. A second automation watches for Status changes. If “Approved,” it fires the downstream action — provision access, release payment, notify the requester. If “Rejected,” it notifies the requester with the reason field.
- Escalate on timeout. A scheduled automation (Make’s built-in scheduler, or a daily Zapier trigger) checks for records still “Pending Approval” after N hours and reassigns them to a backup approver or manager, updating Status to “Escalated” and re-notifying.
Multi-Step (Sequential) Approvals
For workflows needing more than one approver in sequence — manager, then finance, then director — add an Approval Stage number field alongside Status. Each approval only advances the stage by one and re-triggers the routing step, which looks up the next approver for that stage. This avoids needing a separate automation per stage; the same routing logic just reads a different row in an “Approver by Stage” lookup table.
Comparison: Where to Build This
| Tool combo | Best for | Limitation |
|---|---|---|
| Airtable + Make + Slack | Internal ops approvals, most flexible | Requires comfort with Make’s scenario builder |
| Airtable native automations only | Simple 1-step approvals | No native scheduled escalation without Make/Zapier |
| Fillout conditional logic + Airtable | Capturing the initial multi-branch request | Fillout doesn’t manage post-submission state changes itself |
| Dedicated approval tool (e.g. Approve.com-style SaaS) | Compliance-heavy, audit-trail-required approvals | Extra monthly cost, less customizable than DIY stack |
Common Mistakes
- Storing state in the automation tool, not the database. If Zapier’s task history is your only record of what happened, you have no durable audit trail and no way to recover from a failed run.
- No timeout/escalation path. The single most common failure mode in real approval workflows is a request silently dying because the approver missed a Slack message. Always build the escalation step, even a simple one.
- Letting anyone edit the Status field directly. Lock down field-level permissions (Airtable’s paid tiers support this) so approval status can only change through the approved link/automation, not by someone manually editing a cell.
FAQ
Do I need Make/Zapier, or can Airtable automations alone handle this? Airtable’s native automations can handle simple single-stage approvals with email/Slack notifications. Once you need scheduled escalation checks or multi-stage routing, Make or Zapier’s more flexible scheduling and branching earns its keep.
How do I give the approver a real audit trail? Add a linked “Approval Log” table that records who, what action, and when for every status change, rather than overwriting a single field with no history.
Can this scale to dozens of approvals a day? Yes — the bottleneck is usually Make/Zapier task quotas on paid plans, not the pattern itself. Budget for around the tier that covers your monthly automation run volume before launch.
Verdict
A durable multi-step approval workflow is a state machine, not a chain of triggers — put the state in a database table (Airtable is the practical default), route decisions through pre-filled links or Slack actions that write back to that table, and always build the escalation path before you need it. That pattern scales from a one-approver expense request to a three-stage sign-off process without a rebuild.